Virtual CD has powerful analysis functions that enable it to make viable images from source CDs almost every time. If a virtual CD you have created does not work, open the Image Wizard in "rebuild" mode. This way you can add or reread data from the source CD without having to repeat the entire process and create a whole new image. To do this, open the CD Control Center, right-click on the desired image and select Add data to CD from the shortcut menu.
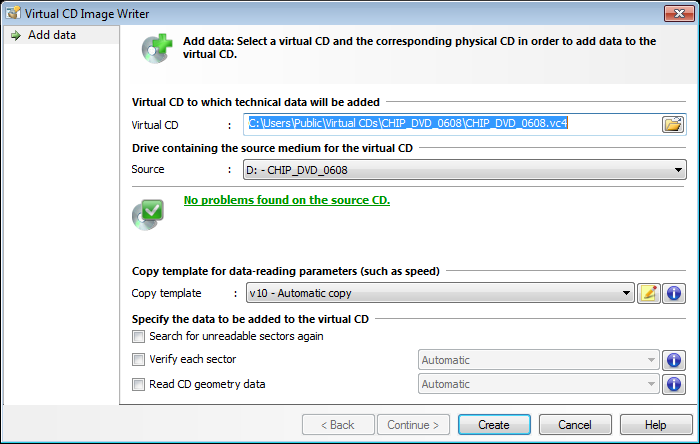
To add data to an existing virtual CD, configure the following settings in the "Add Data to a Virtual CD" dialog:
| • | Virtual CD: Select the virtual CD to which you wish to add data, or that you want to read out again. |
|
You can add data only to virtual data CDs and DVDs; NOT to ISO images or other types of CDs. |
| • | Source: Drive containing the original source CD for the virtual CD. When you select the drive, Virtual CD runs its analysis operation to determine which data should be added. |
|
You can skip the analysis of the CD if you already know exactly which data you want to add. |
|
This operation can only be carried out using the CD from which the virtual CD was made. If a different CD is in the specified drive, the process cannot be started. |
| • | Copy template: The copy template stores various values while data is added to the virtual CD. |
|
Keep in mind that most of the settings in the copy template (such as "Target") will not have any effect, since the virtual CD already exists. |
The last step is to select the data to be added:
| • | Search for unreadable sectors again: In some cases, not all unreadable sectors are found when reading out CD data. Select this option to search the CD for unreadable sectors again. Any additional unreadable sectors found are added to the virtual CD. Unreadable sectors that had already been detected are not read again. |
| • | Verify each sector: Select this option to verify each sector and add the resulting data to the virtual CD. |
| • | Read CD geometry data: Select this option to read out the geometry data and add it to the virtual CD. |
Once all settings have been configured, click on Create to begin reading out the data. The Image Writer opens and reads out the specified data.
|
If you are using this feature to repair a virtual CD that did not work, we recommend using a different drive than the one originally used to create the virtual CD. Another way to repair the virtual CD is to specify the mode for data readout using a copy template rather than using the "Automatic" mode. |