Aside from the previous example, you can also create sound files without an application that supports CD-Text. The playlist presents another option for having the files names assigned automatically. This requires a few additional steps, which are included in the following example for burning using the media player.
|
Configure settings |
First, you need to configure Virtual CD to use the M3U playlist for naming sound files. To do this, open the Settings and select the Burn dialog page. Activate the Get track titles from playlist (M3U) option.
|
With the Get track titles from playlist (M3U) option active, Virtual CD attempts to retrieve the M3U playlist every time files are converted using the sound file mode. This is why we recommend activating this mode only if you are sure you want to use M3U playlists. |
|
The M3U playlist is used only if there is no CD-Text data available. If CD-Text is available and the program you are using is CD-Text capable, the sound file mode will use the CD-Text data. |
|
Assemble the desired sound files |
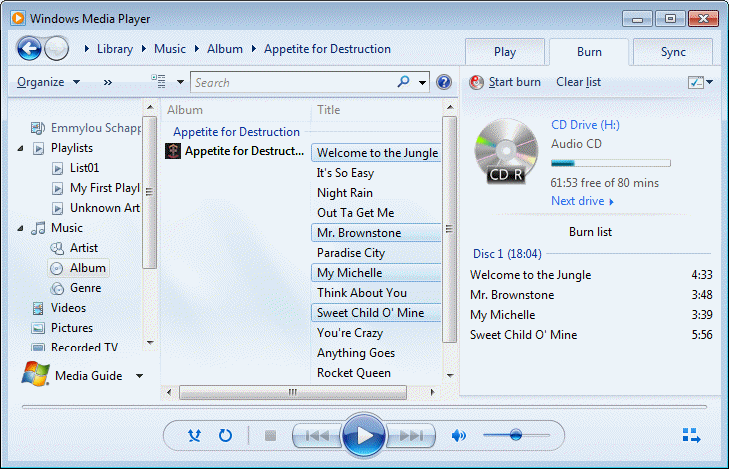
The required settings are all configured, and activating the sound file mode has caused the special blank to be inserted in the virtual burner. You can now run the media player and assemble the tracks you wish to burn.
|
Save playlist |
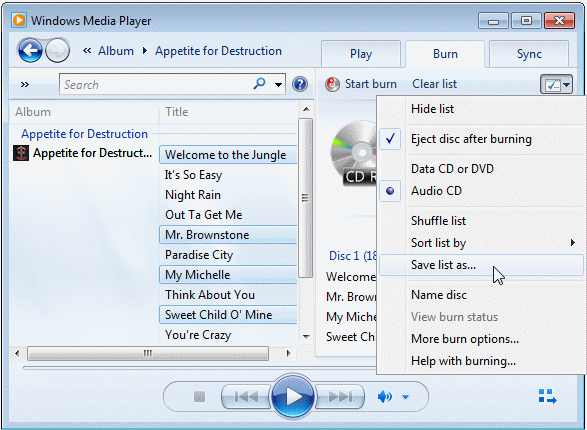
Before starting the burn process, you need to save the M3U playlist. To do this, open the menu of burning options on the Burn page and select Save list as...
This opens a dialog for saving the burn list. In this example, we save the burn list on the desktop so we can find it again quickly later.
|
Make sure you select M3U playlist (*.m3u)., as Virtual CD cannot process playlists in any other format. |
|
Burn the sound files |
Make sure the right burner is specified, and that "Audio CD" is selected in the Burn menu.

Click on Start burn to begin creating the sound files.
|
Convert audio data |
Before the first track is converted, you are prompted to specify the M3U playlist to be used for naming the files.
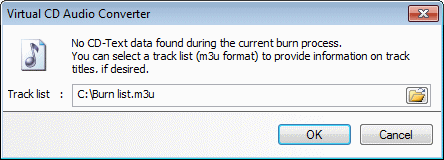
Specify the list saved in the steps described above.
|
If you select Cancel here, only the use of the M3U playlist is canceled; the file conversion process continues. To stop the conversion process, you have to close the subsequent conversion dialog. |
Click on OK to confirm the playlist and continue.
|
The format in which the sound files are created is configured on the Burn page of the Virtual CD Settings program. This has to be configured before you begin the burn process. In this example, we have selected MP3. |

A window opens in the lower right corner with a progress bar indicating the status of the burn process. Closing this window stops the burn process.
|
View the results |
When the conversion has been completed, an action prompt with several options is shown. To view the results of the process, select Open the sound file folder.

You can now see the converted sound files in the Explorer window. Thanks to the use of the M3U playlist, the audio tracks have retained their original names. A playlist, VCDPlayList in M3U format, has also been created, which enables the tracks to be played in their original order.
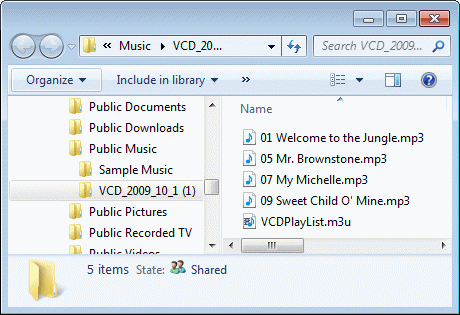
That's it! The new sound files are now ready for use. You can delete the M3U playlist created before the burn process, if you no longer need it.