The following example illustrates the procedure for creating a user profile that is applicable for Virtual CD Administration. This profile will be assigned to the client stations used for managing the virtual CDs that are available over the network. This example presupposes prior configuration of a station group called "CD Administrators."
|
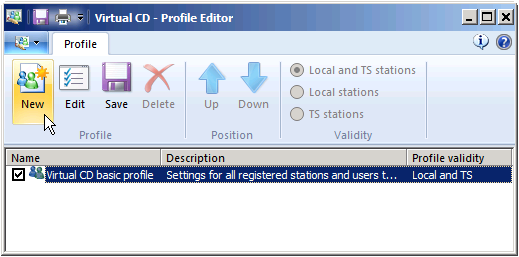
Run the Profile Editor and, in the Ribbon, click on New to create a new profile: |
|
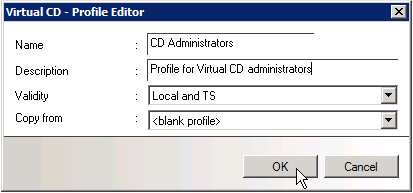
Under Description, we recommend entering a descriptive text so you will be able to recognize the purpose of the profile after some time has passed. Validity: Defines the area in which the profile is valid. Under Copy from you can specify an existing profile to use its settings as the basis for the new profile: |
|
To create a profile with all options enabled, select <blank profile> in the Copy from field. |
Confirm your settings by clicking on OK.
|
At this point, no client stations have been assigned to the profile. To assign client stations, begin by double-clicking on the new profile. |
|
In the Profile Settings, open the Permissions page. Use the buttons to specify the objects that will be assigned to the profile: |
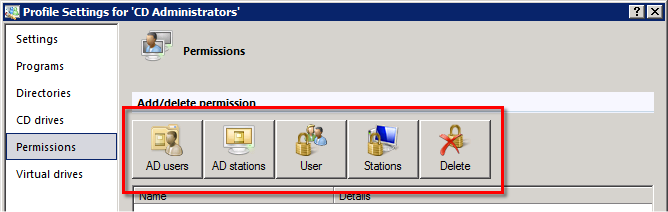
AD users. The profile is applied to AD users and OUs that contain users.
AD stations. The profile is applied to AD stations and OUs that contain stations.
Users. The profile is applied to NT users and user groups.
Stations. The profile is applied to NT stations and station groups.
Delete. Deletes an assignment.
Since the "CD Administrators" group is a station group, we click on Stations.
|
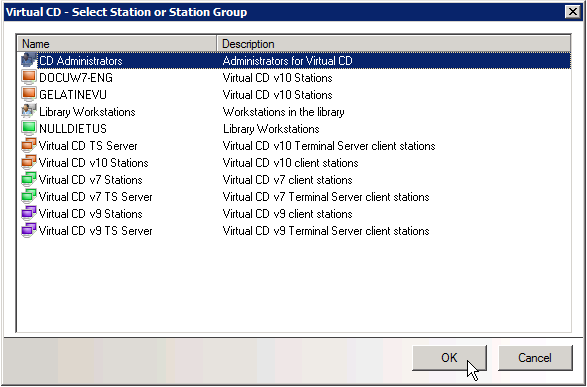
In the Select Station or Station Group dialog, we select the "CD Administrators" group and click on OK: |
This concludes the procedure. All members of the "CD Administrators" group now use the profile of the same name.