Once you have installed Virtual CD TS, its programs are stored on your server and, in some cases, running. Since the virtual CD drives (or virtual burners) are mapped by profiles at login, no virtual CD drives are visible in your Explorer at this point.
To test Virtual CD TS now, run the Virtual CD Settings and add a virtual CD drive.
|
Open the Settings program |
In the Virtual CD Starter, click on Configure settings to open the Virtual CD Settings program.

|
Make sure the Virtual CD Settings program runs with administrative rights, so that your changes can be stored correctly. If user account control (UAC) is active, a prompt to use an administrative account is shown when you open the Settings program. |
|
Add a drive |
In the Settings program, open the Virtual Drives page for configuring virtual drives.
|
You can add a drive or a burner here. Which option is available here depends on the type of drive you selected during installation: virtual drives or virtual burners. |
In our example, we add a virtual burner. Click on the Burner button. The new drive uses the next available drive letter; in this case, "E:".
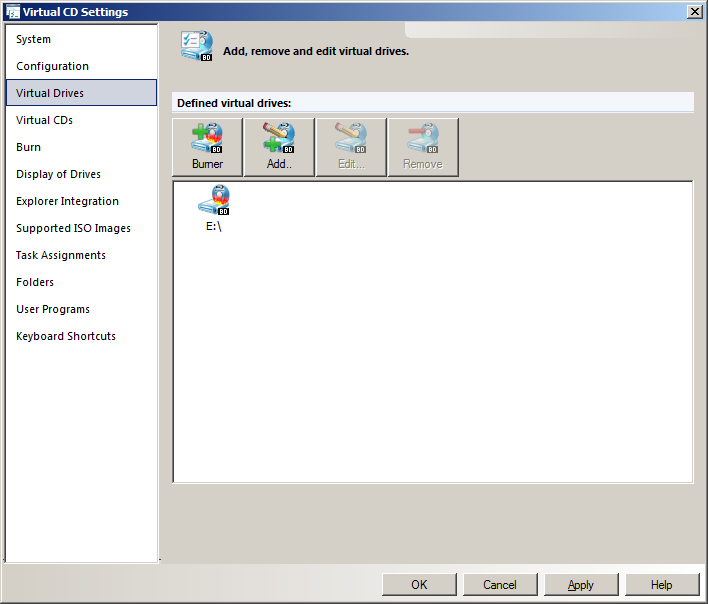
To save your changes and close the Settings program, click on OK.
|
Use the new drive |
Once the drive has been registered in your computer, it is available for use.
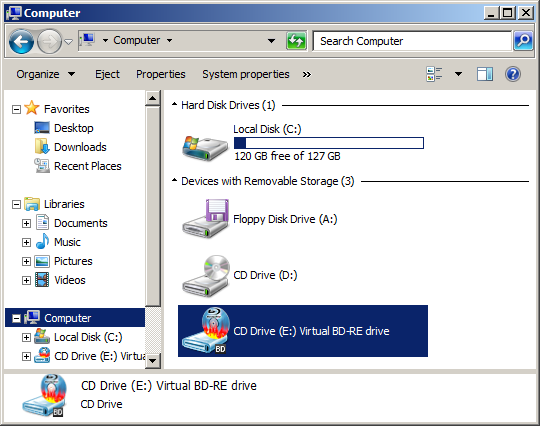
In the above example, we created a virtual burner. At this point in our example, however, the virtual CD drive is still empty.
|
The procedure for setting up a virtual CD drive has been described here as a way to test the functioning of Virtual CD TS. Generally, virtual CD drives are mapped automatically by a profile when a user logs on in a session. |