One of the central tasks in Virtual CD, creating an image, can be accomplished in just 4 easy steps:
|
Run the Image Wizard |
Click on the second option in the Virtual CD Starter: "Create a new image" to begin creating your first virtual CD.

This opens the Image Wizard, the program that defines all of the configuration options for creation of virtual CDs. If the Image Wizard does not detect a CD that can be used as a source, you are prompted to insert a source CD.
|
Insert the source CD |
If the CD from which you wish to make an image is not in the physical CD-ROM drive, insert it now. Make sure the data side of the CD is not scratched or dirty. Wait a few seconds for Windows to detect the CD. If a program on the CD started automatically, please shut it down now.
|
Make sure the source CD is not accessed by any other application while you are making the virtual CD. In particular, make sure that the Windows Media Player is not running; this program is sometimes configured to run automatically any time an audio CD is inserted.
|
If the computer has multiple optical drives that currently contain media, the Image Wizard opens a dialog for selecting the desired source CD. Once you have specified the desired CD, click on Continue to view the results of Virtual CD's analysis of your source CD.
|
Start the writing process |
You now have the choice of editing the description of the virtual CD, if desired. You can also edit the copy template, or select a Quick Copy file. In this example, we will leave the default settings unchanged.
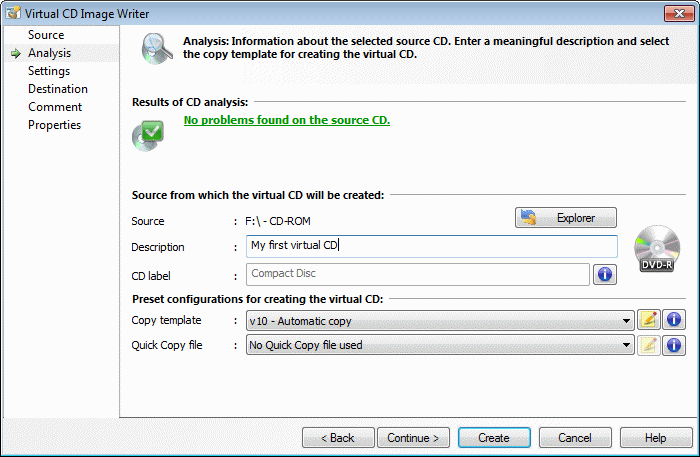
If the source is an audio CD and the "Free DB CDDB" option is enabled, Virtual CD now attempts to download the album title and track titles from the Internet. This service is free of charge (http://www.freedb.org). If your computer is not connected to the Internet when this search is attempted, an error message is shown. This does not affect the creation of your virtual CD—simply confirm and continue.
Click on Create to begin the process of writing the virtual CD. Once all data from the physical CD has been transcribed to the image, the physical CD is ejected from the drive.
If you have any problems while making a virtual CD, refer to Troubleshooting.
|
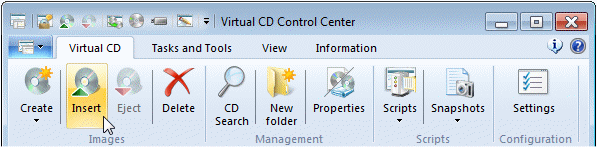
Insert the virtual CD |
Once the Image Writer has created the virtual CD, it is automatically added to the CD Control Center, which now opens. Now you can select the virtual CD and use the Insert command, for example in the Ribbon, to insert it in the virtual CD drive.
That's it! You have now made your first virtual CD and inserted it in a virtual drive.